Build a Token Swap App (AllowanceHolder)
Build a Token Swap App (AllowanceHolder)
This guide walks through building a token swap app in Next.js using the 0x Swap API (AllowanceHolder).
It highlights the core concepts used in production apps like Matcha.xyz and can be adapted to any swap interface.
Try it Out
Code for the demo app used in this tutorial: https://github.com/0xProject/0x-examples/tree/main/swap-v2-allowance-holder-next-app
What We’re Building
This example demonstrates:
- Fetching indicative prices via
/swap/allowance-holder/price - Fetching firm executable quotes via
/swap/allowance-holder/quote - Approving ERC20 allowances for AllowanceHolder
- Submitting swap transactions on-chain
Video tutorial version here:
Pre-requisites
You should be familiar with:
This demo uses Base, but works on all supported chains.
Core Concepts
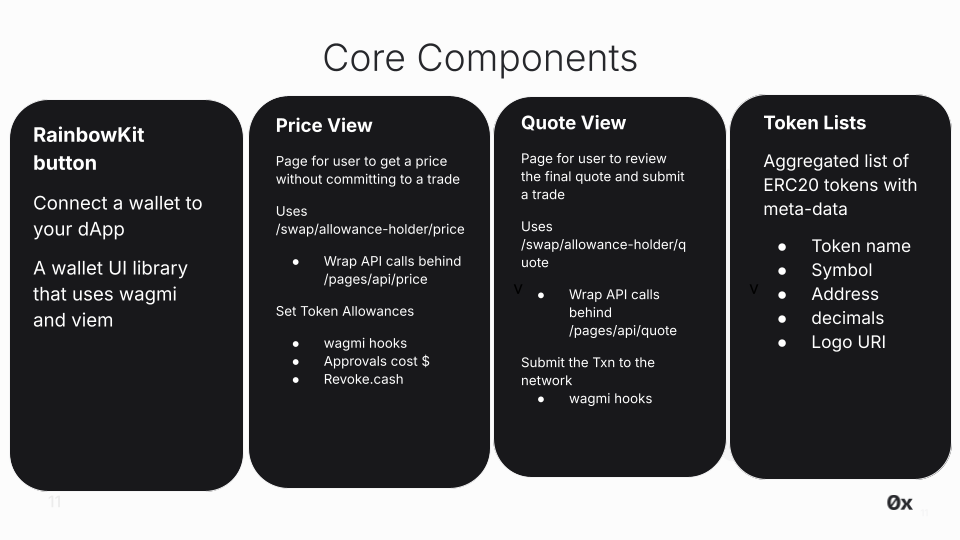
You’ll build:
- 🌈 RainbowKit for wallet connection
- 🏷 PriceView (indicative pricing)
- 💸 QuoteView (firm quotes + submit transaction)
- 🪙 Token list management
These components form the foundation of most swap apps:
🌈 RainbowKit
What is it?
RainbowKit is a React library that makes it easy to add wallet connection to your app. We are using their Next.js App Router example in our app.
Check out their installation instructions to understand the configurations. You can configure your desired chains and generate the required connectors.
Code
Setup WalletConnect projectId in providers.tsx
RainbowKit relies on WalletConnect. Obtain a free projectId from WalletConnect Cloud and replace the key in the .env file.
🏷 PriceView
What is it?
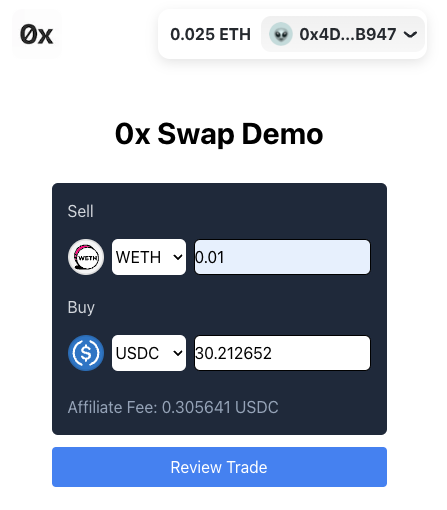
PriceView displays indicative pricing using/swap/allowance-holder/price. Indicative pricing is for users to browse for a price without committing to a trade.
Indicative prices:
- Do not reserve liquidity
- Are ideal for browsing or real-time updates
- Avoid unnecessary
/quotecalls, which should only be used when the user intends to trade
Firm quotes are fetched later in QuoteView.
UX flow
- Select tokens
- Enter amount → triggers indicative price fetch
- Connect wallet (RainbowKit handles network switching)
- Approve allowance for AllowanceHolder
- Review trade → proceed to QuoteView
Code
- Component: /app/components/price.tsx
- Rendered when user has not clicked “Review Trade” (controlled here in page.tsx)
- Price requests are routed through /app/api/price/route.ts to avoid exposing your API key
Fetch Indicative Price
- Triggered via useEffect in /app/components/price.tsx whenever tokens, amounts, or chain changes
- Price requests are routed through /app/api/price/route.ts to avoid exposing your API key
Token Allowances & Approvals
Important: Read Before Using 0x API
-
NEVER set an allowance on the Settler contract. Doing so may result in unintended consequences, including potential loss of tokens or exposure to security risks. The Settler contract does not support or require token allowances for its operation. Setting an allowance on the Settler contract will lead to misuse by other parties.
-
ONLY set allowances on AllowanceHolder or Permit2 contracts, as indicated by the API responses.
-
The correct allowance target is returned in
issues.allowance.spenderorallowanceTarget.
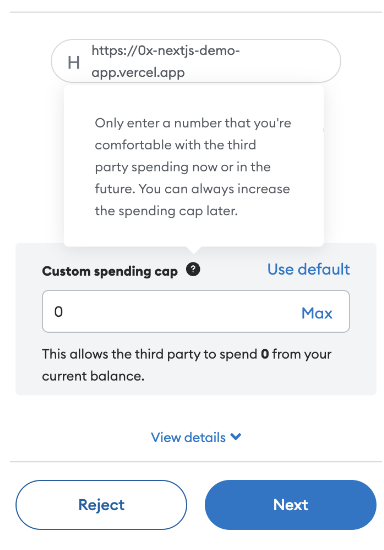
Before placing a trade on the PageView, users must set allowances on all tokens involved. A token allowance lets a third party move funds on your behalf. Essentially, you permit them to move your tokens.
In our case, we want to approve an allowance for AllowanceHolder contract to trade our ERC20 tokens for us. To do this, we need to approve a specific allowance, allowing this contract to move a certain amount of our ERC20 tokens on our behalf. Read more about token allowances.
The logic to check if the user has approved a token allowance the selected sell token is setup in /app/components/price.ts.
- Read existing allowance with
useReadContract - If insufficient → simulate + write approval (
useSimulateContract,useWriteContract) - Wait for confirmation using
useWaitForTransactionReceipt
Be aware that approvals cost gas. Looking for a gasless approach? Check out Gasless API.
Need to quickly revoke an allowance while testing? To revoke an allowance, you can set the allowance to 0. This can be done programmatically or through a UI such as https://revoke.cash/ .
💸 QuoteView
What is it?
QuoteView displays a firm, executable quote returned from /swap/allowance-holder/quote.
Firm quotes:
- Reserve liquidity from market makers
- Contain a fully executable order
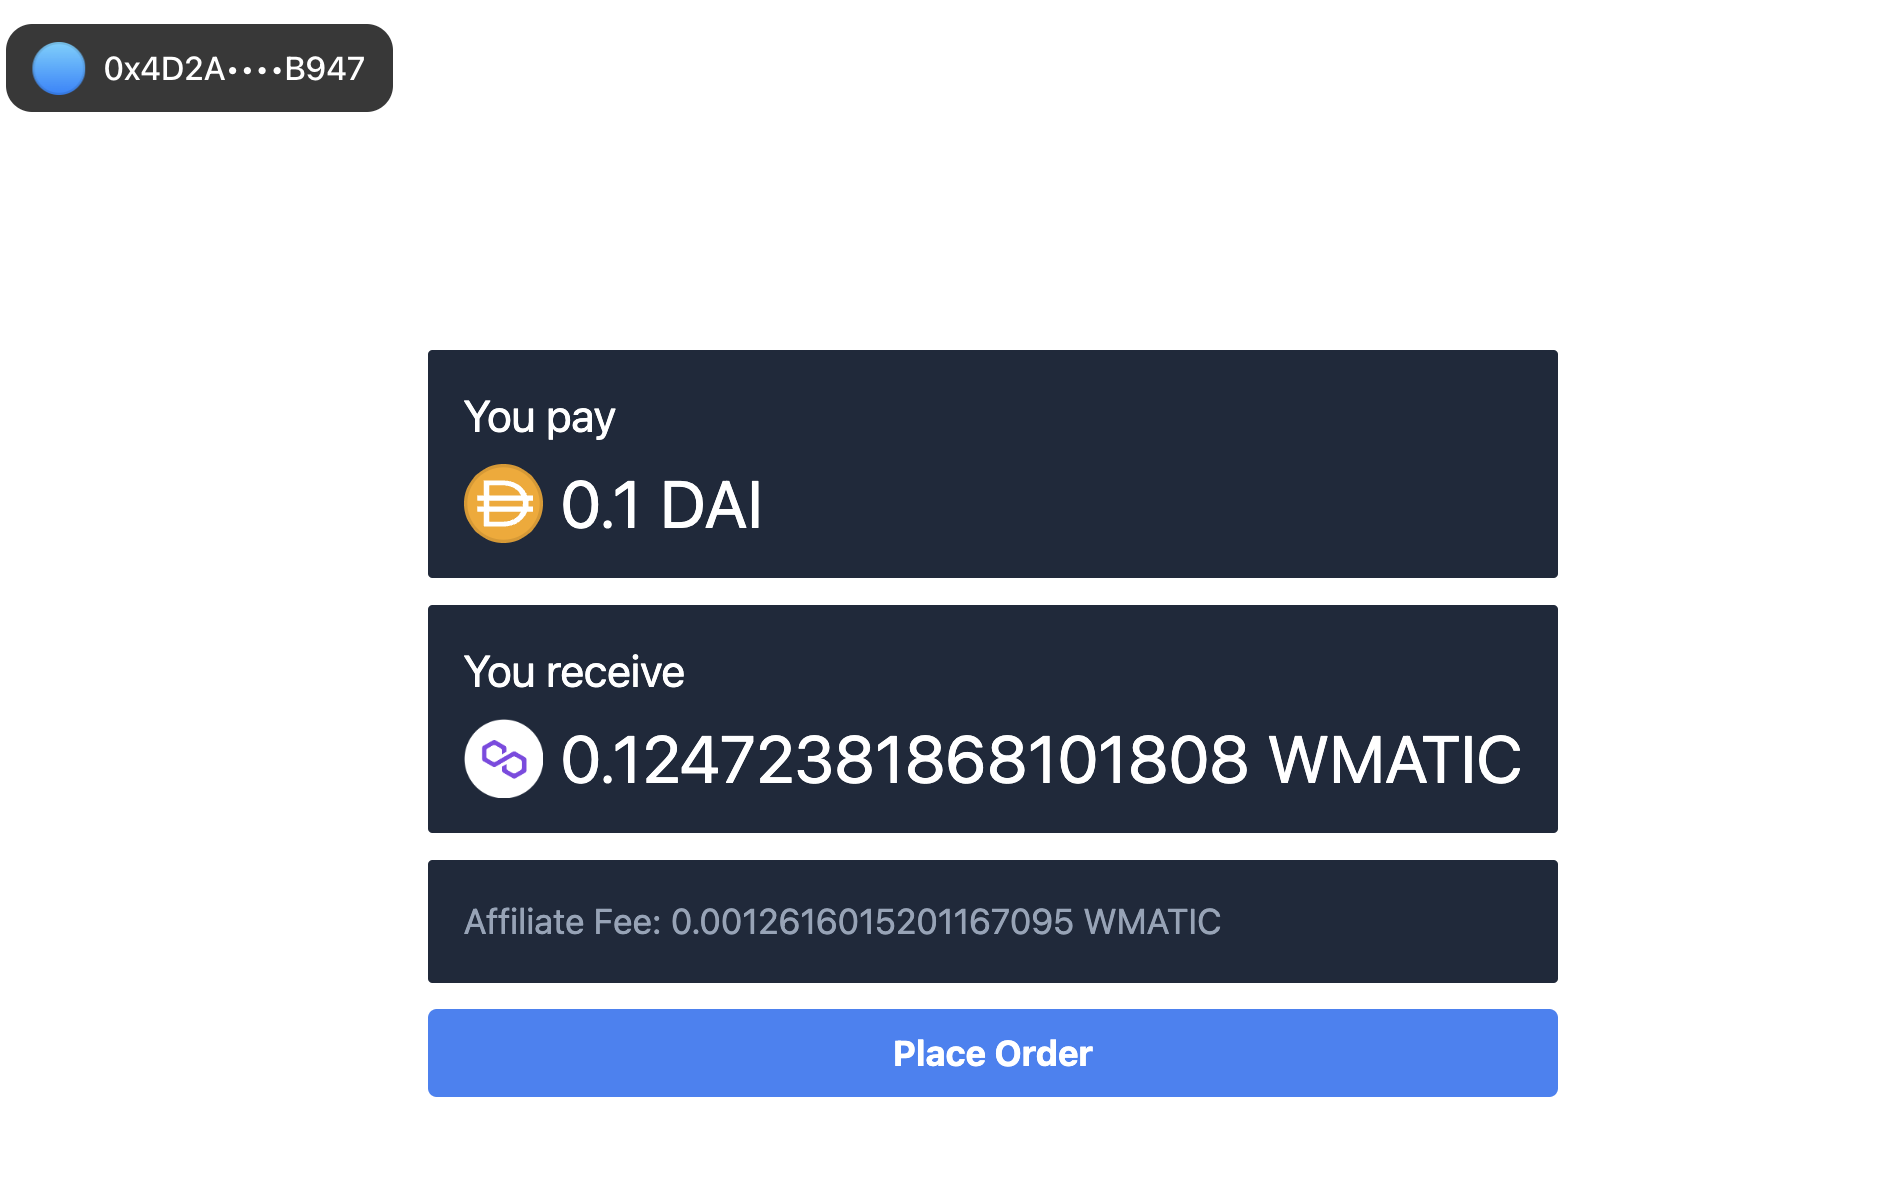
UX Flow
- Shows final sell and buy amounts
- Metadata (symbols, decimals) comes from the token list
- User clicks “Place Order” to sign and broadcast the transaction
Code
- Component: /app/components/quote.tsx
- Rendered after:
- Allowance approval
- Clicking Review Trade
Fetch Firm Quote
- Triggered via useEffect in /app/components/quote.tsx whenever tokens, amounts, or chain changes
- Price requests are routed through /app/api/quote/route.ts to avoid exposing your API key
Submit Transaction
The last step is to submit the transaction with all the required parameters using your preferred web3 library (e.g. wagmi, viem, ethers.js, web3.js). In this example, we use wagmi’s useSendTransaction.
Pass the required params we get from the quote response to sendTransaction. Code here.
🪙 Token lists
What is it?
Token Lists provide curated sets of ERC20 tokens—along with their associated metadata—that applications can use when enabling asset selection (e.g., choosing tokens to swap). These lists typically include:
- Name (e.g., Wrapped Ether)
- Symbol (e.g., ETH)
- Contract address
- logoURI
Developers can either consume an existing list in full or create a customized list derived from one or more established sources.
Commonly Used Token List Sources
-
QuickNode Token API: https://www.quicknode.com/token-api
-
Trust Wallet Assets: https://github.com/trustwallet/assets/tree/master/blockchains
-
Polygon Token Assets: https://github.com/maticnetwork/polygon-token-assets/tree/main/assets/tokenAssets
-
TokenLists Registry: https://tokenlists.org/
-
CoinGecko Token List: https://tokenlists.org/token-list?url=https://tokens.coingecko.com/uniswap/all.json
Code
The demo uses a curated a token list in /src/constants.ts. In production level apps, it’s common practice to maintain a token list since some apps don’t support all available tokens.
Monetize Your Swap Integration
Swap API provides two built-in ways to monetize your swap integration—available on both free and paid plan:
- Affiliate fees: Earn a commission on each trade (demonstrated in this example app).
- Trade surplus: trade surplus (i.e. positive slippage) 1
For implementation details and pricing considerations, see the how to monetize your app using 0x Swap API.
1 Trade surplus is available only to select integrators on a custom plan. Contact support for access.
Conclusion
By following the best practices outlined in this blog post, you can create a user-friendly and effective app that enables trustless token swapping on our supported chains.
You now have a fully functional swap workflow that demonstrates:
- Indicative pricing
- Firm quotes
- Setting token allowances
- Submitting transactions on-chain
This pattern works across all supported chains..
Happy swapping!